- Log into the Amazon WorkMail Client (link)

- Navigate to the organization tab
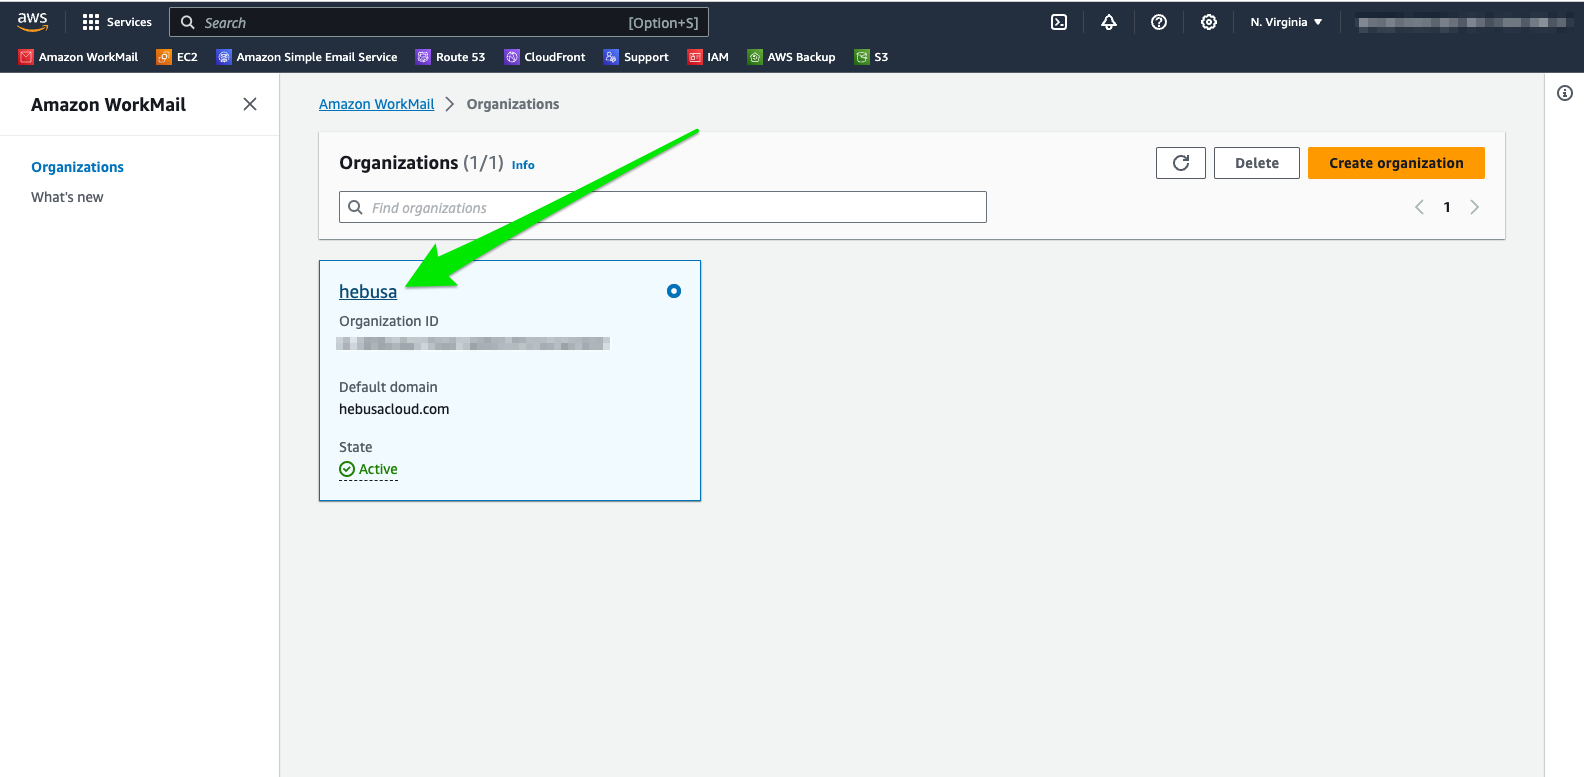
- Click on the link indicated by Article 1 in Figure 1.1

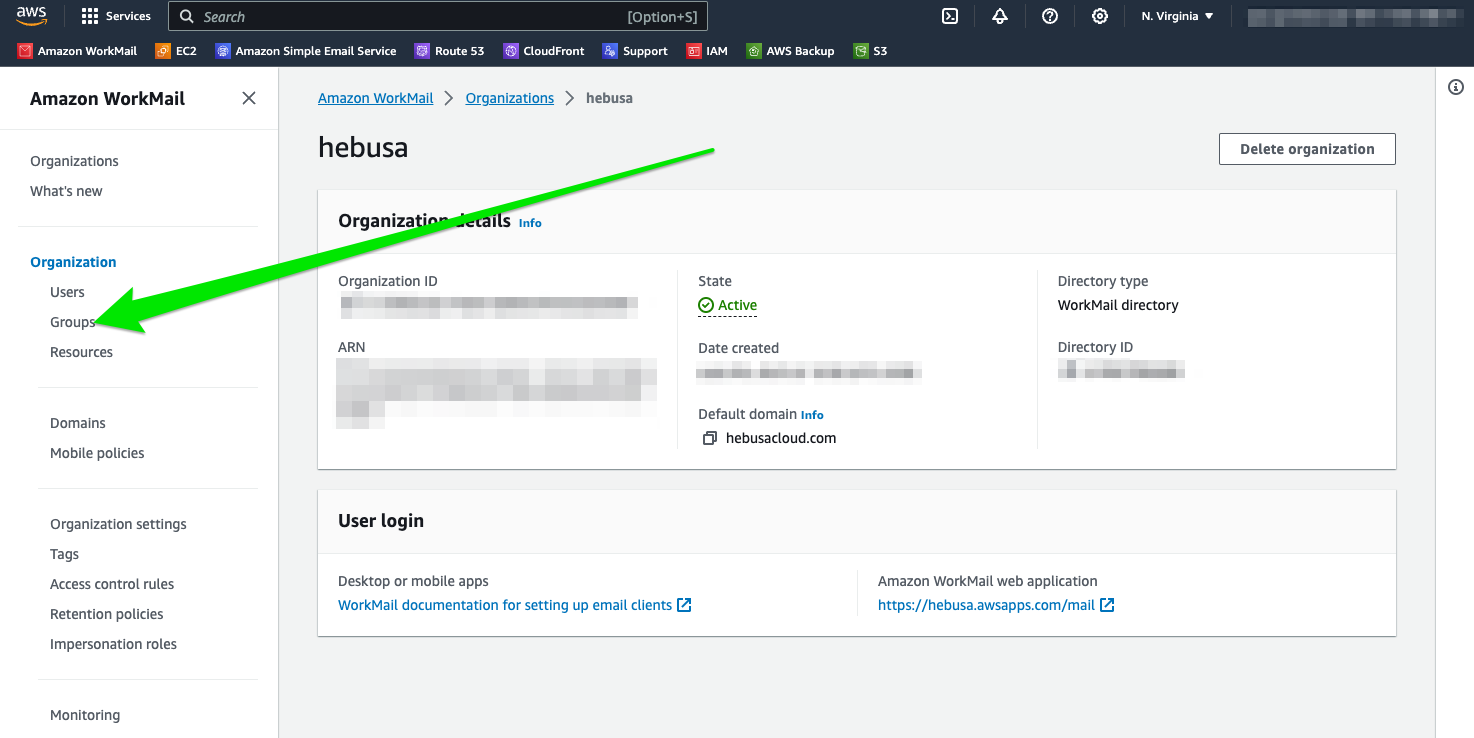
- Proceed to click on the “Users” link as indicated in Figure 1.2 with a green arrow
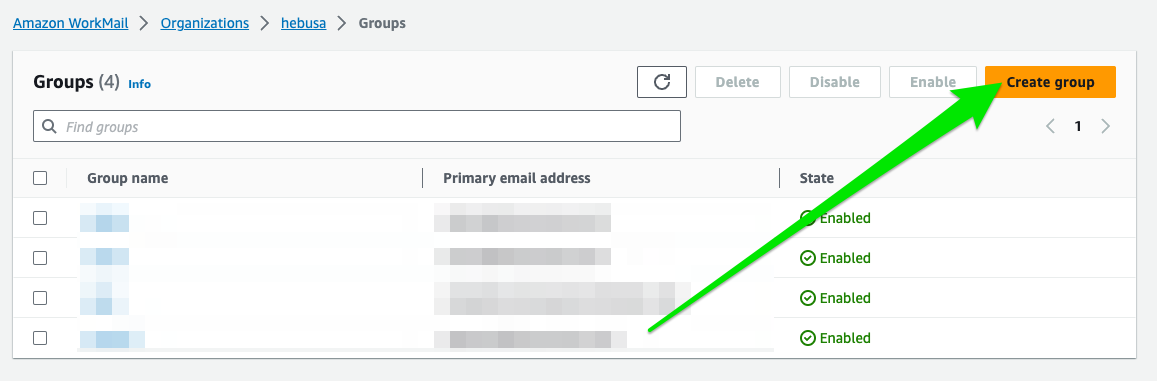
- In order to create a group, click the Create Group button, shown in Figure 1.3
- Upon clicking the button, a form will appear, prompting the user to choose the name of the group, as shown in Figure 1.4
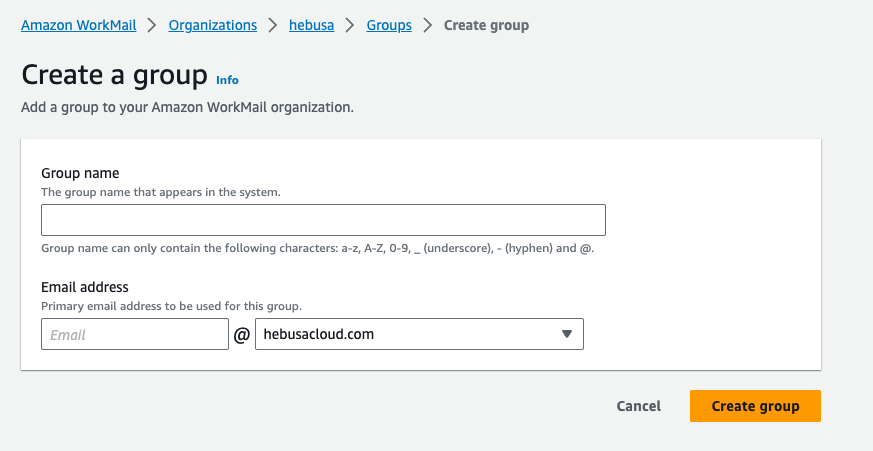
- Enter the name of your group in the respective field and press on the Create Group button as shown in Figure 1.5

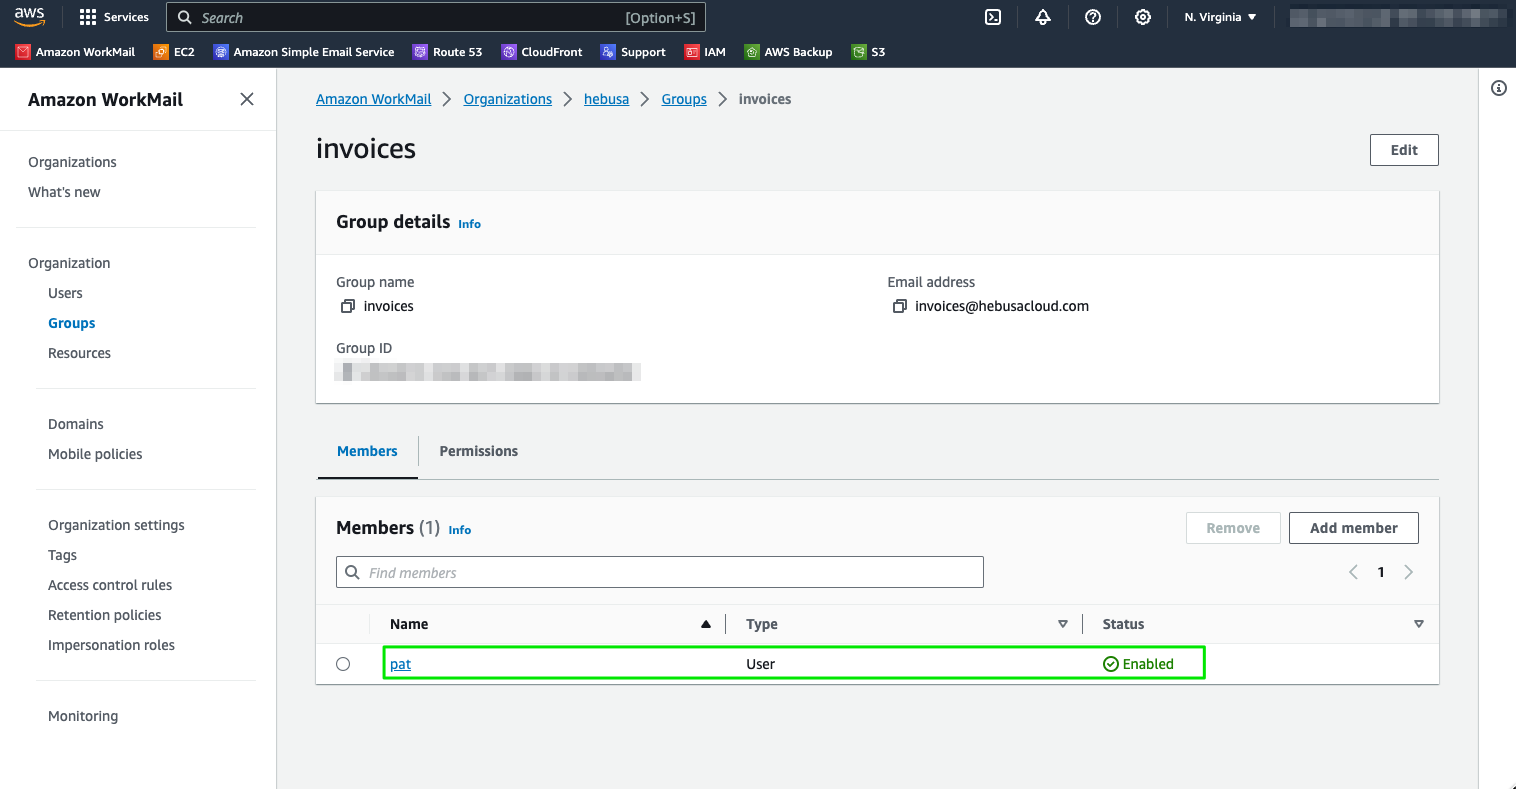
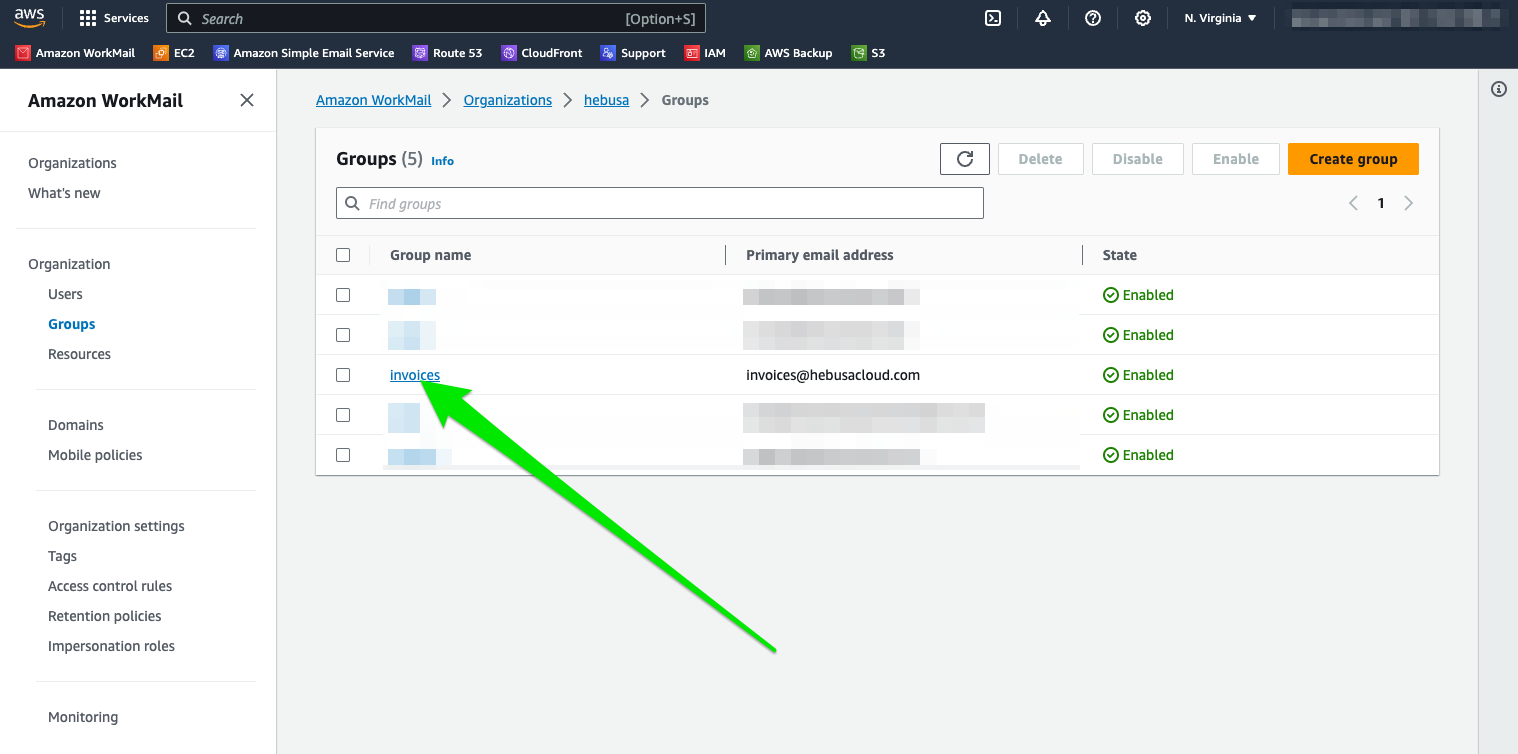
- Once the group is created, members can be added to it. This can be achieved by clicking on the name of your desired group from the list of groups in Figure 1.6
- The group name will take the user to the information about the group, which has a button that says Add Member, as indicated by the red arrow in Figure 1.7
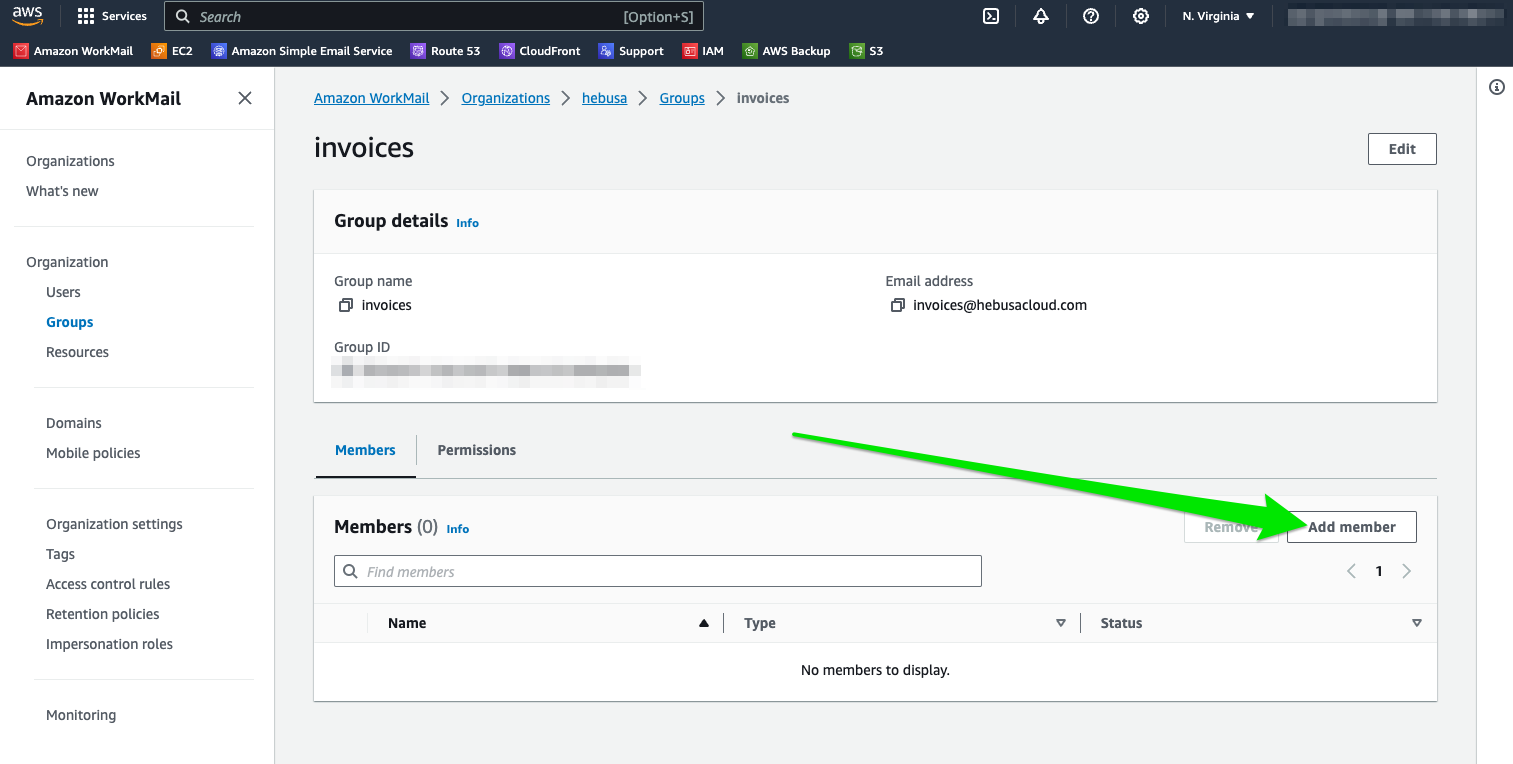
- Upon clicking that button a form will appear
- Upon entering that form, there will be a dropdown menu, indicated by the red arrow in Figure 1.8, which allows the user to choose who to add to the group. Choose who to add to the group from the dropdown list.
- Once all the members are chosen, press the save button at the bottom of the form, as shown in Figure 1.9

- Congratulations, you have successfully added a user to your group. The newly added user should appear in the list of users, as shown in Figure 1.10. If you would like to add more users to your group, repeat this same process starting from step 8